Showing posts with label Skylanders Swap Force. Show all posts

Friday, August 22, 2014

Fire Kraken Upgrade Paths Skylanders SWAP Force

Fire Kraken Base Upgrades

Jade Fire Kraken Base Upgrades

Fire Kraken Attack Damage Numbers

Jade Fire Kraken The Showcase (Top) Upgrade Path

Fire Kraken Magnificent Parade (Top) Upgrade Path

Fire Kraken Stunning Sparker (Bottom) Upgrade Path

Jade Fire Kraken Booming Bouncer (Bottom) Upgrade Path

I didn't put Fire Kraken off, I just wanted to wait for Jade Fire Kraken, and then things got busy...That said, I will admit he probably appeals to me the least from all the SWAP Force Skylanders.  I say that very much aware of the potential backlash due to the extreme number of dragon people out there that love everything regardless...

Fire Kraken's primary attack, Sparking Strikes is actually pretty good.  I was afraid it was so good it would be one of those times all the ugprades are a disappointment...I was wrong.  Glow Stick offered a nice increase, but where the big pay came is with Rising Fountain.  This is roughly a 2 Second charge to deliver 85-128 Damage!  Take "The Showcase" Path and you get it further enhanced both with additional damage and aesthetics.

The Showcase Path is hands down my recommendation up top.  It isn't exactly great, but it looks cool, adds a powerful 50-75 via projectile after you execute Rising Fountain and the firwork ring after the fact is just neat looking...the 12 damage is negligible imo.

The Magnificent Dragon Parade is what everyone raves about...It is literally I ever heard about Fire Kraken.  I am not a fan and I don't think that will change.  The initial run time was a joke, so I figured the upgrade path would extend it like crazy and amp up the damage.  It lasts all of 5 seconds for me.  That isn't much of a parade.  I did realize the Armor jumped +25 which would be a saving grace, but my Jade Fire Kraken that has "The Showcase" also has the +25 so I am not sure what the deal is.  I might appreciate this one slightly more after using it in game, but I will still prefer The Showcase.

Fire Kraken's bottom end is more flash to me, but it is pretty unique and colorful, which I will count as pros in this case.  The damage on the 3rd Hit is very respectable and coupled with Show-Off you get a pretty solid set-up, it is just slow and cumbersome to execute.  Speaking of slow to execute, The Big One needs about 12 seconds to charge!  That is nuts!  However, it is cool, unique, and delivers a crazy 120-180 Damage!  That makes up for the 12 seconds, especially when you consider that you can Primary, Secondary, and I assume Tertiary (although I didn't try it...see, not a fan of Dragon Parade) while the count goes down.

Stunning Sparker allots a temporary (see 12 seconds) speed boost while The Big One lingers...I love speed and this does help you control the setup nicely.  Sizzling Sparkler is, in my opinion, negligible.  

Booming Bouncer is one I had high (ha, punny) hopes for...sadly, they were dashed.  I assumed Bigbadaboom would address the super useful Kraken Up that deals 25-38 when simply jumping.  Sadly, it was tied in with the secondary attack instead and while it is cool, doesn't do much for me damage wise.  Strike the Foes will clear the area out and do decent damage, but any repeated use of it will restart the already long 12 second timer.

The top end Soul Gem, Dance of  Dragons is pretty lackluster, mainly due to Rising Fountain.  I would never release Attack 3 to do it as you will automatically engage it after the 5 second run time.  The bottom end Soul Gem, The Bigger One ups the damage to an amazing 150-225 and adds some more color and a bigger radius...it totally makes up for the top end SG.

My preferred combo would be The Showcase and Stunning Sparker.

For veterans I would suggest The Showcase and Stunning Sparker.  For rookies I would suggest The Showcase and Stunning Sparker.  As you can see, this is one of those cases where my opinion is of the variety that two paths are really better than their counterparts.  The bottom end is really a catch 22.  If you want Speed go with Stunning Sparker, if you want the clearout, go with Booming Bouncer.

Fire Kraken is one of those characters that has base upgrades that really outshine the Upgrade Paths.  That isn't necessarily a bad thing, it just kind of dampens the appeal of the paths since most tie in a perceived increase of epicness.  While it may sound like I am being harsh, I really like Rising Fountain and Sparking Strikes is enhanced very well by the base attacks and The Showcase Path.  It is, in my opinion, his clear strength.  Similarly, on the bottom end, The Big One (and subsequent Soul Gem The Bigger One) totally outshines either path.  In all honesty, I like the base upgrade Kraken Up better than either path combined.

All-in-all Fire Kraken to me is a heavy primary hitter.  The way he is structured I would set up "The Big One" and go to town with the staff until it launches.  He should be quite formidable in this fashion.  Magnificent Parade just does nothing for me personally.  I will give it every chance to win me over, but I can't see it happening.

That said, this guy is very colorful, unique, and will be quite powerful with the play style I described above!

I will work towards trying to figure out if there is a glitch on my end and the parade should last longer and how Jade, not down the Parade Path, got the same Armor increase by checking in on my other JFK.

Monday, July 14, 2014

Rattle Shake Upgrade Paths and Attack Damage Skylanders SWAP Force

Rattle Shake Base Upgrades

Rattle Shack Attack Damage Numbers

Rattle Shake Deputy's Duty Upgrade Path (Top)

Rattle Shake Coiled Ammunition Upgrade Path (Top)

Rattle Shake Bone Herder Upgrade Path (Bottom)

Rattle Shake Grave Springer Upgrade Path (Bottom)

Quickdraw Rattle Shake Full Upgrade Set
Coming Soon!

Rattle Shake starts out as a very well rounded character.  His top end and bottom end attacks deal near equal damage (17-26, 16-24).  The top end base upgrades introduce a very valuable tertiary attack in "Deputy Snake" and a charged attack, "Spring Loaded Snake" with interesting abilities (grabbing items) for the primary option.  The bottom end base upgrades feature additional compliments to Tail Sweep, the box stock attack, and bring an interesting touch with "On Brand" a jump attack.

However, the Upgrade Paths will really change the course for your Rattle Shake.  The top end comes down to a preference between the Primary and Tertiary attack, while the bottom end offers up pretty unique options, which much like Undead Swapper counterpart Night Shift, feature cool animations.

Deputy's Duty may seem pointless at first, after all you've already got it, right?  That, however, is far from the case.  Where "Deputy Snake" hits with 20-30 and then proceeds to spit venom that does 12-18 Damage 14 TIMES, by the time you've added "Nasty Sssurprise" and "Armed to the Fangs" those numbers have surged to 30-45 on Impact and 16-24 on the 14 Venom Hits.  That is a very substantial increase when you do the math.  The biggest asset may not be the cumulative damage, but rather the fact hit enemies are slowed down!  I find this to be very effective.  The snakes home in, but if you are unhappy, just toss another one out and take advantage of the acid splash on impact.

Coiled Ammunition is two fold.  "Snake Bite" poisons the first enemy "Spring Loaded Snake" hits and causes it to take damage (8-12 3x) over time.  "This Bites" is the follow up and has those "poisoned" enemies take extra damage from your primary attack at 24-36 instead of 20-30.  While I love the 45-68 on the first hit and the unique ability to pick up items along the way, there are two big downsides here.  First, only the first enemy is poisoned.  If the poison chain ran along every enemy that the snake ricocheted off of, it would be a different story.  Second, and tying in with that, the "first hit" poisoned enemy only takes 8-12 damage 3 times.  Yes, I know that they take more damage when I shoot them, but the +4/+6 is lacking when you consider that you will only have a few ticks of the clock to cash in..By then, the enemy has pursued you and you will have to retreat, or just use other attacks...likely not being a charged attack of any sort, which rules out the Coiled Ammunition Path.  I feel like if the snake ricocheted AND did maybe 5-8 hits of damage to give you a bigger window to cash in on things would be different.  As is, Deputy's Duty does more damage, 11 extra times, and SLOWS enemies...I have to give it the edge here.

The Bone Herder Upgrade Path introduces a "Goliath Bone Snake" that you charge up and release.  This summons a literal giant, bone snake from the ground that springs upward off the screen.  With Damage Numbers of 90-135, this is the "big hit" some people are drawn to...The next installment "Dances with Snakes" has you move around to conjur smaller snakes that follow the same mechanic.  These auxiliary bone snakes will do 60-90 Damage.  This one is a lot of fun, but I have found that in tough situations your likely only going to be able to get the "Goliath Bone Snake" to launch at your intended target.  If you aren't as concerned with accuracy, but rather fun, it can't be beat and when it does make contact it deals incredible damage.

The Grave Springer Path isn't quite as dramatic, but it is effective with cool artwork of its' own.  "Spurred Spring" let's you charge up quickly and spring into the heat of a fight.  This deals 40-60 damage, but is complimented with "Graveyard Smash" (contestant for best upgrade name ever) which spawns roughly 5 Tombstones when you land and inflicts 25-38 Damage.  Obviously, with 5 tombstones in play, this has a pretty nice area.  The scenario would be you have deployed your top end initiatives and then spring forward towards the target enemy and "Grave Springer" does auxiliary damage.  Put it together and you have, at minimum 65 Damage, with the possibility of 98 and additional damage/kills depending on what enemies lurk around your target.

Before we cover my suggestions, I have to stress that both top and bottom Soul Gems, "Raise the Snakes" and "The Snake-Skinned Kid" respectively have a red flag.  While the Critical Hit and Speed boosts are great and the animation/concept is unique and very fitting, there is an aesthetic change.  I will warn you in advance that both of these Soul Gems turn their respective half of Rattle Shake purple.  I actually don't mind the change...it is menacing and somehow very "Undead," however, I also really liked his box-stock aesthetics.  Plus, being from Texas and dealing with Rattle Snakes, I have a hard time with the purple...Some of you will love it, some will hate it...most will just want the benefits of the Soul Gems and not really care.  However, amongst the hard core fans I know these aesthetic changes matter.  Rubble Rouser, Dune Bug, Pop Thorn, Prism Break, even Slam Bam's Yeti Cooling Factor have had a long track record of angst for select Portal Masters.  I am fortunate in that I have the extra Rattle Shake and could leave him Soul Gem-less.  If you have Quickdraw you are in a tough boat...Do you max out your prized variant, or do you let him go without Soul Gems to maintain his unique look?  It is up to you...I personally went with a combo, lol.

For rookie players I would suggest you go with Deputy's Duty and Bone Herder.  Deputy Duty is a compliment to both Snake's Venom and Tail Sweep (and all their other upgrades).  It comes in VERY HANDY.  Bone Herder will take some time to get good execution collectively, but I feel like the prospect of getting good with one Goliath Snake is more beneficial to rookie players than Grave Springer as you can still retreat.

For veteran players I would suggest Deputy's Duty and your choice of Grave Springer and Bone Herder.  Grave Springer may seem a bit more "dangerous" due to flying in towards your enemies, BUT just like rookies needing to perfect "Dances with Snakes" this isn't the easiest upgrade set to cash in on...

Personally, I think the ideal combo is Deputy's Duty and Grave Springer.  Deputy's Duty is a no brainer and super effective (as long as you remember to use it).  One of Rattle Shake's best moves, in my opinion, is simply hitting enemies with "Armed to the Fangs."  I like to do that, let the snake run it's course and then go about my business with the other attacks.  Grave Springer wins out for me because I can use "Ssstampede" to soften up a target, rush in with "Spurred Spring," get bonus damage from "Graveyard Smash" and then repeat the process to get out of harms way and set up the next attack.  This has a much higher hit rate than "Dance's with Snakes."  I do miss Goliath Bone Snake with this set, but I feel it is made up for with the success rate.

Thursday, July 10, 2014

Skylanders SWAP Force Night Shift Upgrade Paths and Attack Damage

Night Shift Base Upgrades

Night Shift Attack Damage Numbers
(Click to Enlarge)

Legendary Night Shift Base Upgrades

Night Shift Proper Vampire (Top) Upgrade Path

Legendary Night Shift Champion Fighter (Top) Upgrade Path

Night Shift Warping Vortex (Bottom) Upgrade Path

Legendary Night Shift Underbat (Bottom) Upgrade Path


Night Shift is a very cool character and was my most anticipated swapper to upgrade.  There is a reason I tout he and Boom Jet's Double Pack so much.  I also have to say that I think the Teleport Ability is the best of all the Swappers, so that puts Night Shift and Hoot Loop in high regard.

That said, what about his upgrades?  Night Shift is one of those characters that really doesn't have to have anything past his base upgrades...they are that good.

Up top the Base Upgrades touch on the primary attack bumping damage output +4/+6 to 28-42.  The punches are quick and have a very nice range.  Don't Move, Just Stick!  is a charged version of the primary attack and offers up one of the best animations in the game as well as delivering a staggering 100-150 damage points, and the charge time for it is minimal.  Rounding the top end out we have Vampire's Bite which is a really vital addition in my opinion.  The one weakness to Night Shift is his low base health (likely to offset the "A Batty Coach" extra life/lives.  However, Vampire's Bite does nice damage (40-60) AND gives you +20 Health each time you use it!  That means you can rattle it off 10 times in a row and garner and 200 HP back in your direction!  This top end trio is really a force to be reckoned with and one of the best base upgrade sets in SWAP Force.

But, then there are the paths.  Proper Vampire is my personal pick.  Why?  It is just super functional.  The first installment, Infections Smile, deals the same 40-60/+20, but adds in enemies taking 10-15 damage 5x afterwards.  The follow up, Healthy Appetite, is what seals it.  Damage jumps to a staggering 60-90 and your health gained jumps 10 points from 20 to 30.  What is not to love?  Inflict major damage, gain +30 Health, and still have a quick, good ranged primary with a powerful primary charged attack!

That said, if you are a fan of hard hitting upgrades, or just need cash, go with Champion Fighter.  I must warn you that the gloves will change appearances here...Prize Fighter give you a chrome glove set that turns 115-173 damage, while Pay Day puts out more cash after each hit and an impressive 130-195.  The only downside (at least for some) is that Pay Day has, somewhat fittingly, replaced the chrome gloves with a high luster gold pair of gloves.  This makes PERFECT sense on Legendary Night Shift imo.

So, you basically have to pick between a super hard hitting path with slight cash bonuses in Champion Fighter and a very formidable path with health incentives in Proper Vampire.

But wait, there is more!  The top end Soul Gem, Gentlemanly, makes ALL ATTACKS do more damage!  You can see the damage numbers in the spreadsheet...very, very nice!  Oh, and by "all" they didn't disappoint or shortchange us this time...it also applies to the bottom end upgrades!

Down low, Night Shift has another near perfect set of base upgrades.  Float Like a Vampire makes up for his teleport not doing any damage by jettisoning a projectile that does 25-38 Damage.  Foggy Movement grants +8 Speed (35-423) and you know how much I love speed upgrades!  A Batty Coach is where Night Shift takes things to a whole new level.  You may have thought the top end with a health incentive Proper Vampire and a cash producing Champion Fighter were hot tickets, but this BASE UPGRADE allows Night Shift to return from the dead...literally.  Let's say you lost your Night Shift in Nightmare Mode...fear not, A Batty Coach, brings him back!  The animation is epic and you literally get that second chance you always wish you had with your other Skylanders!  Oh, but lest we forget...it gets better!

If you are a fan of "A Batty Coach," you will no doubt want to take the Underbat Path.  While nothing flashy like the 195 damage on Pay Day, Underbat just does the usual...you know grant you 2 extra lives...WHAT?  Yep, "Round 2" will puff your health up a bit when you come back with "A Batty Coach," but "Luck of the Underbat" will let you return from death TWICE.  This is something we have never seen before in Skylanders, and regular viewers/readers should know how fond I am of the "unique" abilities of Skylanders.

If you think that is just overkill, or feel once is enough for your superior play style and you desire more damage output, you will want to take the Warping Vortex Path.  I'm not sure many people will ever even take this path because Underbat is so special, and useful, but some Story Mode purists with multiple Night Shifts will likely explore it at some point...

I have to say, it is also pretty good.  "Vortex of Doom" will appear when you teleport and pull enemies in towards the vortex.  The finishing act, "Close to Doom" adds damage to the vortex by way of 18-27 3x.  The greater asset might just be being able to dart around the arena/level, and use the vortex to set up enemies for your charged attack for quick deaths, or to get some health back with Proper Vampire.  You really can manipulate the field to your liking if you are well versed with this upgrade.  Oh, and don't forget that you also have the projectile to work with while teleporting and making vortexes!

Lastly, both paths are aided by the bottom end Soul Gem of "Grand Entrance."  This slows enemies down considerably after you have teleported and appear in front of them.  This may seem lame, or leave you wanting something epic like an explosion etc., but trust me, this is useful.  If you took Warping Vortex you now can further direct the enemies to your liking, and should you ever have incidentally teleported into a bad situation you have time to abort, or set up and adjust.  With Underbat, it lacks the direct interaction, but it will allow you to better utilize all your upgrades to avoid having to rely on Underbat and that should count for something...Not flash at all, but very functional.

All-in-all, Night Shift did not disappoint and is without a doubt one of m favorite Swappers!  He has great aesthetics, incredibly unique upgrades, paths, and abilities, and he offers up a play style all his own that no other Skylander comes close to offering.

My personal choices are Proper Vampire and Underbat.  Proper Vampire does great damage AND boots your health, which is vital with a character like Night Shift who has a lower base health line.  Underbat is just too unique to not suggest.  It is the ultimate offset for the low base health.  It will also be like a 3 strikes set up in PvP.  I will say, that if you don't play much PvP, or are content with one extra go and primarily play Story Mode and Challenges, you would be better off with Warping Vortex, which likely will not get much love due to how unique Underbat is.

For rookie players I would suggest Proper Vampire and Underbat.  It is the ideal combo for surviving.  If you are more inclined to like the flashy, hard hitting paths go with Champion Fighter up top and Warping Vortex down below.

The bottom line with Night Shift is that all his Upgrade Paths are great.  The only one that isn't incredibly unique is Warping Vortex and it is very functional.  Extra Health, Extra Cash, or Extra Lives...Night Shift has it all!

Wednesday, July 9, 2014

Skylanders SWAP Force Wind-Up Upgrade Paths with Attack Damage Numbers

Wind-Up Base Upgrades

Wind-Up Attack Damage Numbers

Yes, I am aware that "Windup Punch" should be listed first under Winder Path...

Wind-Up Toy Box Path

Wind-Up Winder Path


Wind-Up is a bit of a cult favorite.  He had a decent size fan base prior to being released, and those who were so fervent about him have maintained.  I think the recent single pack release will make him even more popular.

Wind-Up, despite being the character who should have been in the Tower of Time AP, is a Tech Element Newlander and ties in very well with the "tech" concept.

His Base Upgrades touch on the Primary and Secondary while introducing a Tertiary Attack.  This makes him fairly well rounded, but quite vulnerable when you make a habit of Winding Up...When "unwound" Wind-Up is really slow, hence the vulnerability.

If you are concerned with that, you will be inclined to take the Winder Path.  This is my path of choice just because I like the look of the Windup Punch.  The big draw to it is Power Crank that pulls in enemies and deals extra damage.  The logic of myself and many others is simply that this will allow Wind-Up to do what he does best, Windingup, AND totally compensate for the lack of speed thanks to the combo of Power Crank and Auto Wind Up, which winds you automatically when you take damage.  It works quite well and then you can continue to Power Crank, or use the charged attack Windup Punch to deal some very HIGH DAMAGE 120-180.  Again, my main draw was offsetting his weakness (being unwound) and just plain and simple I think the Punch is cool.

However, the Soul Gem, Spring-Loaded Crank,, takes away some of what should have made the Winder Path special.  It gives him +15 Speed, but also automatically winds him up while running.  So, if you took Toy Box , but liked to use your Wind Up abilities, when you start to flee any surviving enemies, you are simultaneously filling your meter to Wind Up again.  Granted, it is still faster (slightly anyway) by way of the Winder Path, but those who make it out to be the better path, or emphasize that aspect as a shortcoming of the Toy Box Path are wrong.

Granted, just comparing the two paths there is no doubt that Winder is superior to Toy Box in terms of helping you utilize the secondary attack Wind Up.

The catch is that the Soul Gem compensates for that deficiency and makes Toy Box a viable choice.

While Winder should have been a juggernaut for those who love to Wind Up, the Soul Gem coupled with Toy Box make you compare the numbers.  Since the only real stand alone upgrade to Winder is found in the Windup Punch you have it's very impressive 120-180.  But, while Toy Box doesn't deliver the big hit, it delivers a lot of smaller hits.  Just going with a 1-2 of 34 and 42 you are up to 78 and can fire it off again without charging up to jump to 156.  Perform Crash Cymbal while fully wound up and assume we get non-critical hits and you could have upward of 212 by the time the 6th hit rolls around.  Furthermore, you have access to an upgrade to the tertiary attack.  Holding that button will let you fire off 9 Toy Gun missiles that do 18-27 damage 8 times.

That said, it really comes down to how you like to play Wind-Up and what you prefer aesthetically.  If you like the old toys with cymbals or have an affinity for suction cup guns, take Toy Box.  If you prefer the comical wind up boxing gloves go with Winder.  On the gameplay side if you like the primary and an idea of a longer ranged weapons go with Toy Box.  If you prefer to use the Wind Up ability and like the massive damaged from charged one-hit attacks go with Winder.

For rookies I would hands down suggest Toy Box.  I am inclined, with the Soul Gem anyway, to think that it is the more well rounded path.  That said, I still like Winder, once again, primarily for the animations and instantaneous refilling of the meter.  It would have been nice to have the Soul Gem be an Armor Boost that would then keep the Winder Path dedicated to "Attack 2" and Toy Box for "Attack 1 and Attack 3," but oh well.

Bottom line, both paths are good.  The Soul Gem really does serve to offset some of the downside to not taking Winder and makes Toy Box just as good of a choice.  Ultimately I truly suggest you go with which attacks and aesthetics you personally like best and call it good.

Thursday, July 3, 2014

Skylanders SWAP Force Countdown Upgrade Paths with Attack Damage Numbers

Countdown Base Upgrades

Countdown Attack Damage Numbers

Countdown Boom Buddies Forever Upgrade Path

Countdown Rocketeer Upgrade Path

Kickoff Countdown Rocketeer Upgrade Path
with thewalkthruking


Countdown was actually one of my most anticipated new Skylanders in SWAP Force.  I thought he looked pretty cool and he is reminiscent of California Raisins for some odd reason...Plus, I also think of Europe's "The Final Countdown,"  In fact, to get in the spirit for writing this I just fired the song up...

Anyway, I really do think Countdown is the bomb...sorry, but you have to admit it is somewhat punny.

That aside, (and yes, Europe's "Final Countdown" is really playing), Countdown did not disappoint.  His base upgrades ave very good and set you up for a touch choice in terms of paths.

Rocketter addresses his primary attack Rocket Blast and truly delivers.  You begin with Triple Threat that greatly increases the horizontal range of the attack.  Warhead Hands ups the damage even more, but the BIG payoff is from Mega Mortar that ups Controlled Burst to 80-120.  I still think Triple Threat is the most vital down the path as it really plays into a broader range.  You can use it to soften up hordes of enemies and then launch Mega Mortar at the stalwarts.

Boom Buddies Forever will no doubt appeal to many people.  It lets you have up to 4 Boom Buddies, ups the damage, and adds Lingering Sparks that do light damage as they run to enemies.

I have always and remain inclined to go with non-doubles paths...To make it simple think Boom Buddies Forever, Double Trouble's Conjuror, and Sonic Boom's Medea Griffin.  I don't know why, the "minaitures" just never appeal to me as much as the standard fare stuff.  That said, as mentioned in the video, Double Trouble and Sonic Boom's "mini" paths turned out to be pretty dang good.

Luckily, Countdown has all his bases covered.  I took regular Countdown down the Rocketeer Upgrade Path, LightCore Countdown down the Boom Buddies Forever Upgrade Path, and then I'll take Kickoff Countdown down Rocketeer.  Why, because it is my path of choice.

I fully endorse Rocketeer because I enjoy the increased horizontal range and damage numbers.  Plus, as mentioned, I'm still not a big fan of the minis...However, they make a lot of sense for Countdown and I will admit this...If the minis for Kickoff Countdown were little soccer ball bombs I would have a 2nd Kickoff Countdown just because of that...It would have been EPIC!

I think Rocketeer is good for those of you like me who just prefer it, those who like the Rocket Blast best, and players looking for something simple to improve Countdown.  Boom Buddies Forever is a solid path and will no doubt appeal to many...

My only complaint is not being able to control the bombs and the Lingering Sparks are a bit weak.  I would have loved to see Armor tired in with Rocketeer and Speed tied in with Boom Buddies Forever.

I was also sad that both paths were entirely one trick ponies. Rocketeer only addressed the Primary Attack and Boom Buddies Forever only addressed the Tertiary Attack.  What is my favorite attack you ask?  Bomb Head/Hefty Concussion of course!  It would have been cool to see it expanded upon, but I suppose the Soul Gem is a nice nod...and a ridiculously powerful one at that!  It is a true screen-cleaner, but be warned that you have 6 seconds of down time afterwards (and Countdown looses some memory).  Just time it accordingly and you should have no issues!

All-in-all a great addition to the Tech Element and someone I hope to see carry the torch for future games!  Both paths are solid, it just comes down to what you want to expand: Rocket Blast, or Explosive Friendship.

Tuesday, June 17, 2014

Unboxing Jade Fire Kraken Skylanders SWAP Force Alt Deco

What? Jade Fire Kraken, Fire Element, SWAP Force, Bounce Ability
Where Did You Get It? Walmart
What Did It Cost? $14.96 plus tax
What Was Stock Like? Well Stocked, 12 on the Pegs
What is Included? Jade Fire Kraken, Stat Card, and Sticker Sheet

Unboxing Jade Fire Kraken


Jade Fire Kraken
Fire Element, SF Swapper

Jade Fire Kraken Packaging, Front and Back


Slogan: "Burn to be Wild!"

Jade Fire Kraken and Stat Card


Card Stats
Power: 170/200
Armor: 70/200
Agility: 170/200
Luck: 60/200
Totals: 470/800

Jade Fire Kraken and Fire Kraken

Fire Element Swappers
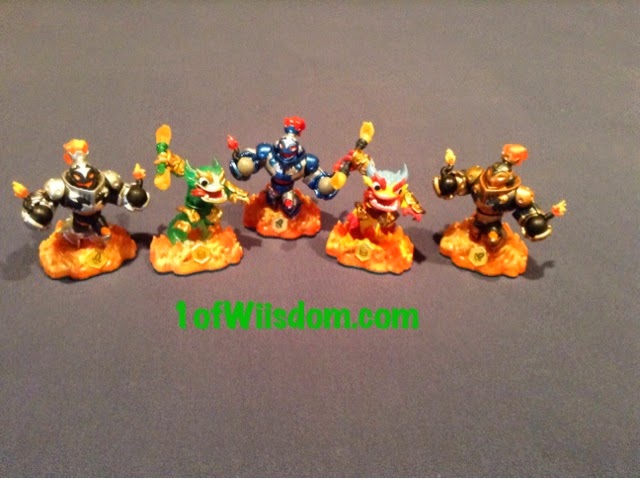
Dark Blast Zone, Jade Fire Kraken, Patriot Blast Zone (Custom), Fire Kraken, and Blast Zone

Bounce Swappers
Rattle Shake, Viper Strike (Custom), Jade Fire Kraken, Fire Kraken
Not Pictured: Quickdraw Rattle Shake

Jade Collection
Jade Flashwing (Target Exclusive in Giants), Jade Fire Kraken


Thursday, June 5, 2014

Magna Charge and Nitro Magna Charge Upgrade Paths with Attack Damage Numbers Skylanders SWAP Force

Magna Charge Base Upgrades

Nitro Magna Charge Base Upgrades

Magna Charge Attack Damage Numbers

Nitro Magna Charge Magnetic Armaments Upgrade Path (Top)

Magna Charge Magnet Tuner Upgrade Path (Top)

Magna Charge Static Buildup Upgrade Path (Bottom)

Nitro Magna Charge Drag Racer Upgrade Path (Bottom)


Magna Charge has always been a very intriguing character for me...I have mentioned several times how he reminds me of a robotic paintbrush from The Learning Company's Super Solver's Midnight Rescue game...It is an old, Windows 95 educational game that some of you may be familiar with...I remember it, Morty Maxwell the Master of Mischief, and Shady Glenn Elementary School quite vividly...Magna Charge could easily take on the roll of one of Morty's 5 Robotic Paintbrushes...

So, nostalgia aside I just truly like Magna Charge's aesthetics.  I'm also a fan of his unique abilities.

His Base Upgrades are a lot of fun.  You can summon items (or pick up enemies) and slam them into other enemies to do impressive damage.  His Magnet Cannon does overheat fast, but that makes it do more damage and it fires off the small numbers very quick!  Down low you can drag enemies and throw them forwards, or backward to gain a dash forward that also damages enemies.  He is very well rounded and very fast!

Up top, you really can't go wrong.  Magnetic Armaments upgrades the Magnet Cannon and offers up a hard hitting Fireball after you've maxed out and overheated the cannon.  This shoots on command after the 3 second run time of the Magnet Cannon.  This path is probably best for rookie players, or those looking for a simple, yet effective path.  The Soul Gem further enhances all of Magnetic Armaments.

Magnet Tuner is my choice for the top end.  I mentioned you can't pick a bad path up top, and I stand by that statement.  However, to me, Magnet Tuner takes advantage of what is most unique about Magna Charge and capitalizes on it in a bigger fashion.  Magnet Tuner turns out some impressive damage!  I don't want to lean you this direction as Magnetic Armaments has to be taken seriously, despite the lesser numbers, due to the speed at which they fire off...That said, Magnet Tuner is something we've never seen before and I personally have a blast with it.

Down low, I'm a bit disappointed in both paths.  Given how fast he is (he is a Speed Swapper), I would have liked to see an electromagnetic field left behind while dashing that would damage enemies...Even the old Flameslinger idea of "making a circle" that might have ignited a huge electric column would have been welcome in my book.  What we got instead is some overlap on the base upgrades.  Static Buildup doesn't do much with Shock Stop, but Crash Test really amps up the damage output of Shock Stop AND Eject, which turns out to be massive numbers on the forward dash, which the game and strategy guide completely fail to even mention does damage at all...I think Static Buildup is probably best for Story Mode.

Drag Racer is the perfect path for Nitro Magna Charge (assuming you equate "Nitro" with racing).  This one disappointed me more than Static Buildup initially just because of the repetitiveness...Rapid Repel offers no increase in damage and Opposites Repel was marginal...Static Buildup bumping the damage on Eject is really the dividing line in my opinion.

Drag Racer could have bumped the speed slightly to offset the Static Buildup's gain on Eject...That would have been really cool.  Or, another idea I had was a "Burnout."  Down Drag Racer Nitro Magna Charge (or regular) could hold "A" (or the secondary attack button on your console) and do a burnout that fills the screen, or area behind/around him with smoke that damages enemies and he would then dash off and deal damage, or have a proportionate increase in speed to the duration the button was held.

That is just my take anyway...

That said, I think Drag Racer will actually turn out to be great for Arena Challenges.  It may not offer up much in terms of increased damage, but the ability to pickup 2 enemies, throw them out, and keep going will make quick work of large groups of weaker enemies.

Up top, you can't go wrong with either path...You either want the simple and effective Magnetic Armaments, or the unique Magnet Tuner Path.  Down below, you can go with the harder hitting Static Buildup, or quicker hitting Drag Racer Path.  I'd suggest Static Buildup if you just have one Magna Charge and enjoy story mode.  If you are done with story mode and just have Bonus Missions and Arena Challenges, consider Drag Racer.

Friday, May 30, 2014

Zoo Lou Upgrade Paths and Damage Numbers

Zoo Lou Base Upgrades

Legendary Zoo Lou Base Upgrades

Zoo Lou Attack Damage Numbers

Zoo Lou The Bucking Boar Upgrade Path

Zoo Lou The Wild Wolf Upgrade Path


Zoo Lou is a very unique character.  He never physically attacks enemies himself, but rather relies on summoned animal friends to do the dirty work.  You have Birds, Boars, and Wolves in the arsenal.  The Birds are the primary attack, the Wolf is the secondary attack, and the Boar is the tertiary attack.  The Base Upgrades address Birds and add the Boar along with one supporting upgrade.  The Wolf is left completely out of the loop in the Base Upgrades.

Naturally, many would think, "Okay, the Wolf was left out, I should take Wild Wolf to balance things out."  The Strategy Guide even boldly states, "The Wild Wolf Path edges it out (Bucking Boar Path) because Bird Call upgrades also help out against groups and you get extra food as a bonus."  I have seen the strategy guide state the obvious and offer insights, but I can't recall seeing it blatantly tell you which path is better

And now that I have seen it...I disagree.

Wild Wolf is an okay path...in fact, it is probably a great path for those having trouble in challenges or tough portions of story mode.  Alpha Wolf increases the attack damage and health of the wolf and Hunger of the Wolf gets him to attack a little quicker.  That said, Hunter and Gatherer is the big payoff as this is where the Wolf will dig up food when your health is low.

I didn't get to check the health of the wolf, or have food dug up for me, but I feel I know enough.  I can't argue that getting food at low health is of great value, but what about needing damage support instead of the food?  My biggest disappointment is that there was never a 2nd Wolf.  Now take a 2nd Wolf into the mix and you have one aiding in on immediate protection and the other digging up food and we have something going.

That said, I still would have to recommend Wild Wolf for beginners and players who need a character with good health attributes to get them through tough parts of the game, whatever those may be...Hunter and Gatherer will definitely be worth while for those endeavors.

The Bucking Boar turned out to be a big surprise.  I'll say that just as not getting a second wolf disappointed me, the fact that the boar never got faster was also a disappointment.  What wasn't a disappointment was going from 18 to 58 Armor.  That +40 is a big deal to me and can be appreciated just as much by pretty much any Portal Master who realizes that increased armor on that scale can very well keep you from winding up at low health and needing food.  Hog Wild really didn't do much for me, but Rough Rider did.  This sounded lame and I was fully anticipating a few pebbles flying up and dealing some meager damage number like 5-8, or 10-15.  The 30-45 is great!  Plus, factor in that you are doing damage on the boar from the front via Raging Boar and then have the rocks out the back and you have a great ranged attack from what was once slow and very limited in range.

However, the biggest asset in my opinion is the fact that you get Rough Rider's rocks and Thicker Pigskin's Armor in conjunction with the simple observation that you can summon both the Wolf and Birds (even the Soul Gem Birds of Prey) WHILE riding on the boar!  That is a big advantage in my opinion and definitely shifted the tables in favor of Bucking Boar.

Again, for rookies and players needing a Skylander capable of regenerative health, take Wild Wolf.  Similarly, if you just really like the Wolf attacks, take Wild Wolf.  For those on the fence, and the small few that might honestly prefer the Boar, go ahead and take The Bucking Boar Upgrade Path...I know you will not be disappointed!

Wednesday, May 28, 2014

Hoot Loop and Enchanted Hoot Loop Upgrade Paths with Attack Damage Numbers Skylanders SWAP Force

Hoot Loop Base Upgrades

Enchanted Hoot Loop Base Upgrades

Hoot Loop Attack Damage Numbers

Enchanted Hoot Loop Dream-Weaver Upgrade Path (Top)

Hoot Loop Hypno-Owl Upgrade Path (Top)

Enchanted Hoot Loop Telekinesis Upgrade Path (Bottom)

Hoot Loop Escape Artist Upgrade Path (Bottom)

Hoot Loop is a Magic Element Swapper with the Teleport Ability.  The teleportation abilities alone make him very unique.  I think he and Night Shift might be representative of my favorite ability of the 8 found in SWAP Force.  Don't hold me to that just yet, but I am a big fan of teleporting in SWAP Force.

You really can't go wrong with any of Hoot Loop's Upgrade Paths, but they are very different.

Dream-Weaver is my personal choice for the top end...It plays a lot like Double Trouble's Channeler.  It hits very hard and you can hold the attack infinitely.  That said, Hypno-Owl is the more unique path and winds up doing pretty good damage while slowing enemies.  This one comes down to play style.  I think Dream-Weaver is the best choice for most, but if I just had one Hoot Loop, I think I would have been inclined to take Hypno-Owl, just because of how unique it is.  The Damage Numbers are pretty much the same (+/- 1), so this one, more than most, really comes down to personal preference.

Telekinesis is a nice path and probably the better choice for new players, or those looking for an easy way to deal damage.  Escape Artist is actually able to do similar damage, but not in the same spot...It is good for a quick hit-and-run type scenario, although I consider it more of an evasive move.  Telekinesis has to be charged, but is easy to execute.  Escape Artist, in my limited experience, can be hit and miss.  If you plan to teleport over, do damage, and escape back and it fails, you might be up a creek.  I'm sure it gets better over time, but I had some issues getting 100% success with it.

The good news, for those that have Hoot Loop and Enchanted Hoot Loop is that you can take all of the paths and see what you like best first hand.  Again, you really can't go wrong with any, the top end is almost identical damage wise and the bottom plays similar with Telekinesis being a bit easier to execute than Escape Artist.

Sunday, May 25, 2014

Custom Painted Skylanders

Welcome!  I hope your weekend has been full of sky-blues, a dash of sunshine yellow, and the bright colors of Springtime...

Nah, not really...but I do hope everyone is having a great Memorial Day Weekend!

Something I have wanted to do for a LONG time is treat some of my Skylanders to a custom paint job.  First, I think some would look cool in alternate colors.  Second, I have so freaking many of these things it will actually allow me to distinguish between them (ie is this my Sandhog Terrafin, or Brawler Terrafin).  Third, you can create customs...Think Star Strike should have been pink?  You can make it happen!  Want to have a Legendary Terrafin, a green Zap, or a Crimson Red Hex?  It is all possible!

Supplies are really cheap and all you will be out is a little time.  Granted, some are easier to paint than others and there is a lot of detail in these figures...The more details you recreate (or re-color) the longer you will be involved.

That said, I plan to give this a go an see how everyone likes it.  Judging by my families reaction I think everyone should have some interest in this.  My Nephew was very impressed, so hopefully that sentiment carries over as well.

Anyway, this post will outline the Introduction and any subsequent custom painted Skylanders.

Stay tuned for updates!

Custom Painted Skylanders : Cheesy Introduction, Art History, and Knockout Terrafin


Custom Painted Skylanders Episode 1: Knockout Terrafin's Reveal
Legendary Blue Metallic Knockout Terrafin


Custom Painted Skylanders Episode 2: 
Green Rattle Shake

Custom Painted Skylanders Episode 3
Mystic LightCore Hex


Custom Painted Skylanders Episode 4
Patriotic Blast Zone (Full Repaint!)

Custom Painted Skylanders Episode 5
Heartbreaker Roller Brawl

Custom Painted Skylanders Episode 6
Quicksilver Slam Bam

Custom Painted Skylanders Episode 7
Legendary Blue Metallic Terrafin (Series 2)

Custom Painted Skylanders Episode 8
Scarlet Stealth Elf (Series 2)

Custom Painted Skylanders Episode 9
Acid Bomb Eruptor (Work in Progress)


Custom Painted Skylanders Episode 10
Savior Stump Smash (Series 2)

Custom Painted Skylanders #11
Legendary Chopper

Custom Painted Skylanders #12
Enchanted Torch

Custom Painted Skylanders #13
Legendary Blue Metallic Terrafin (Series 1)

Custom Painted Skylander #14
Blackberry Cynder

Custom Painted Skylander #15
Autumn Blast Bumble Blast

Custom Painted Skylander #16
Quick Silver Rip Tide

Custom Painted Skylander #17
Doom Raider

Custom Painted Skylander #18
Legendary Blue Metallic Shark Shooter Terrafin